

The Cache Management Dashboard
The Magento cache in Magento 1.X is managed under System->Cache Management
After clicking that link you should see a full list of your caches, similar to below. The types of caches may vary depending on what extensions/FPCs or even Varnish modules you have enabled.
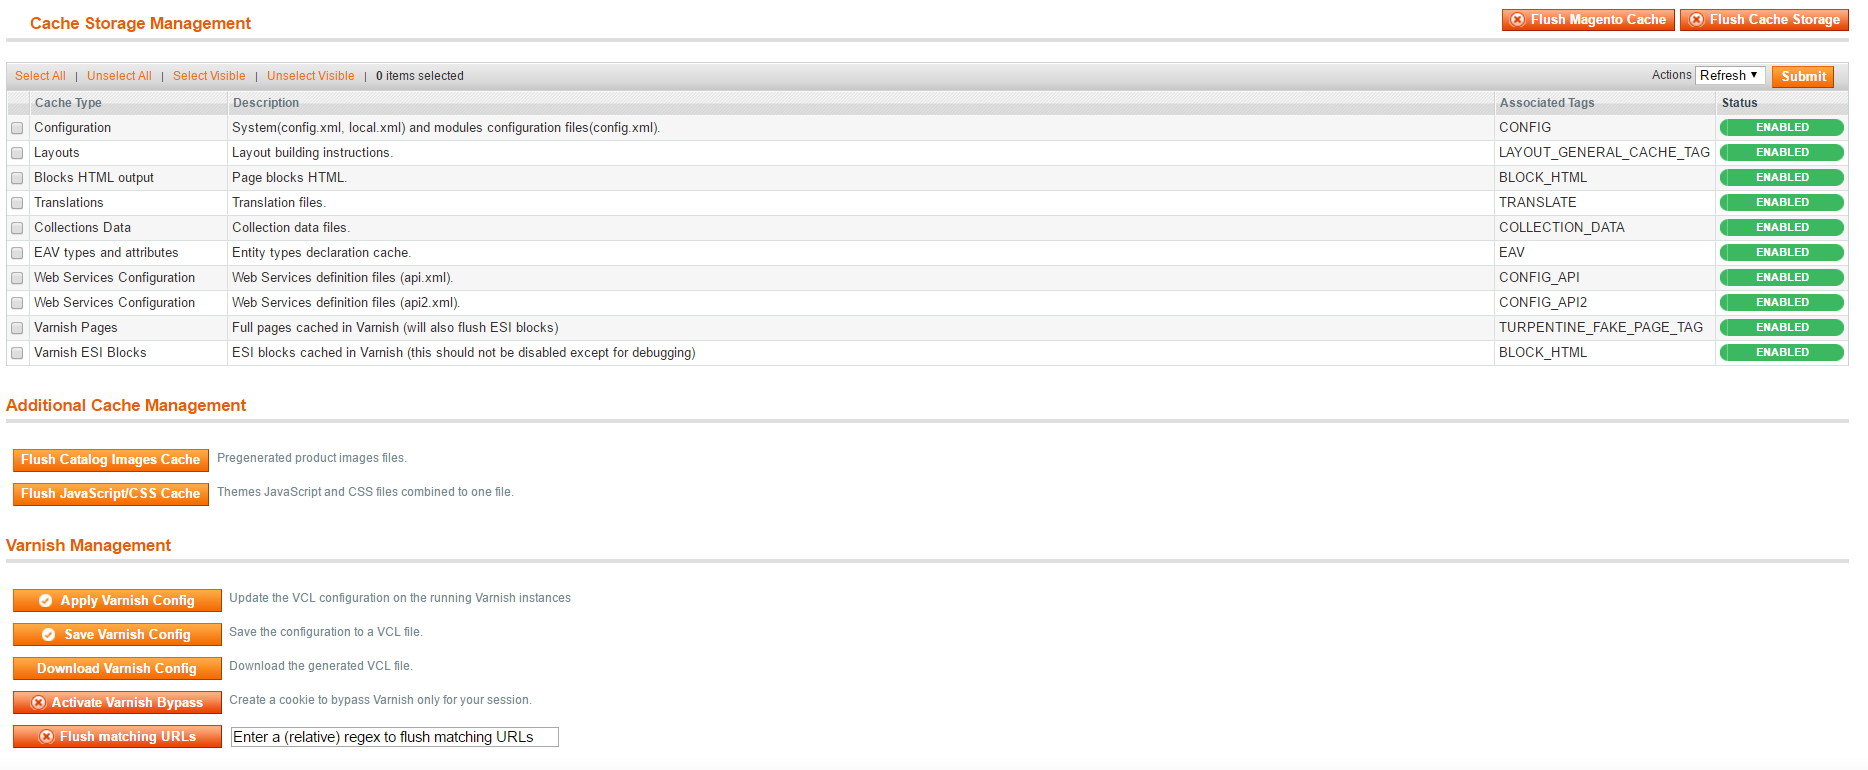
In the above case, we see this site is using the standard Magento caches alongside Varnish through the Turpentine module. Caches that are invalidated with show up as Invalidated in a red bubble under the Status column. Invalidated is nto necessarily bad, it just means the caches are out of date and could be serving older content.
Flushing the Cache
- Log into your Magento admin.
- Go to the System->Cache Management
- Check the boxes on the left for the caches you want to flush

4. Select Refresh from the actions drop-down in the top right

5. Hit Submit, those caches are now refreshed/flushed for you.
Alternatively, you can flush every cache by clicking near the top right of the Cache Management area.
Flushing Redis Cache
If your site is using Redis-cache, the above methods should still work to clear/refresh the cache. But you can also flush redis specifically on our servers by running this command on our servers via SSH.
$ redis-cli flushallOK

He is the CEO and founder at MageHost. Sahil loves to solve problems and makes sure his clients have a speedy website. When not working hard on his Mac, he is seen traveling!

0 Comments